Reading the station layout from a geometry file.
Import geometry file
On this page
To import the station layout of the seismic network installed at Hoher Sonnblick the file seisrock_sbk_inventory.xml of the tutorial data set is needed. Make sure, that you have this file available at your file system.
Opening the geometry editor
To import the geometry file, the collection node edit geometry has to be executed. The access the geometry editor using the edit geometry collection node involves the following steps.
Create a collection named geometry
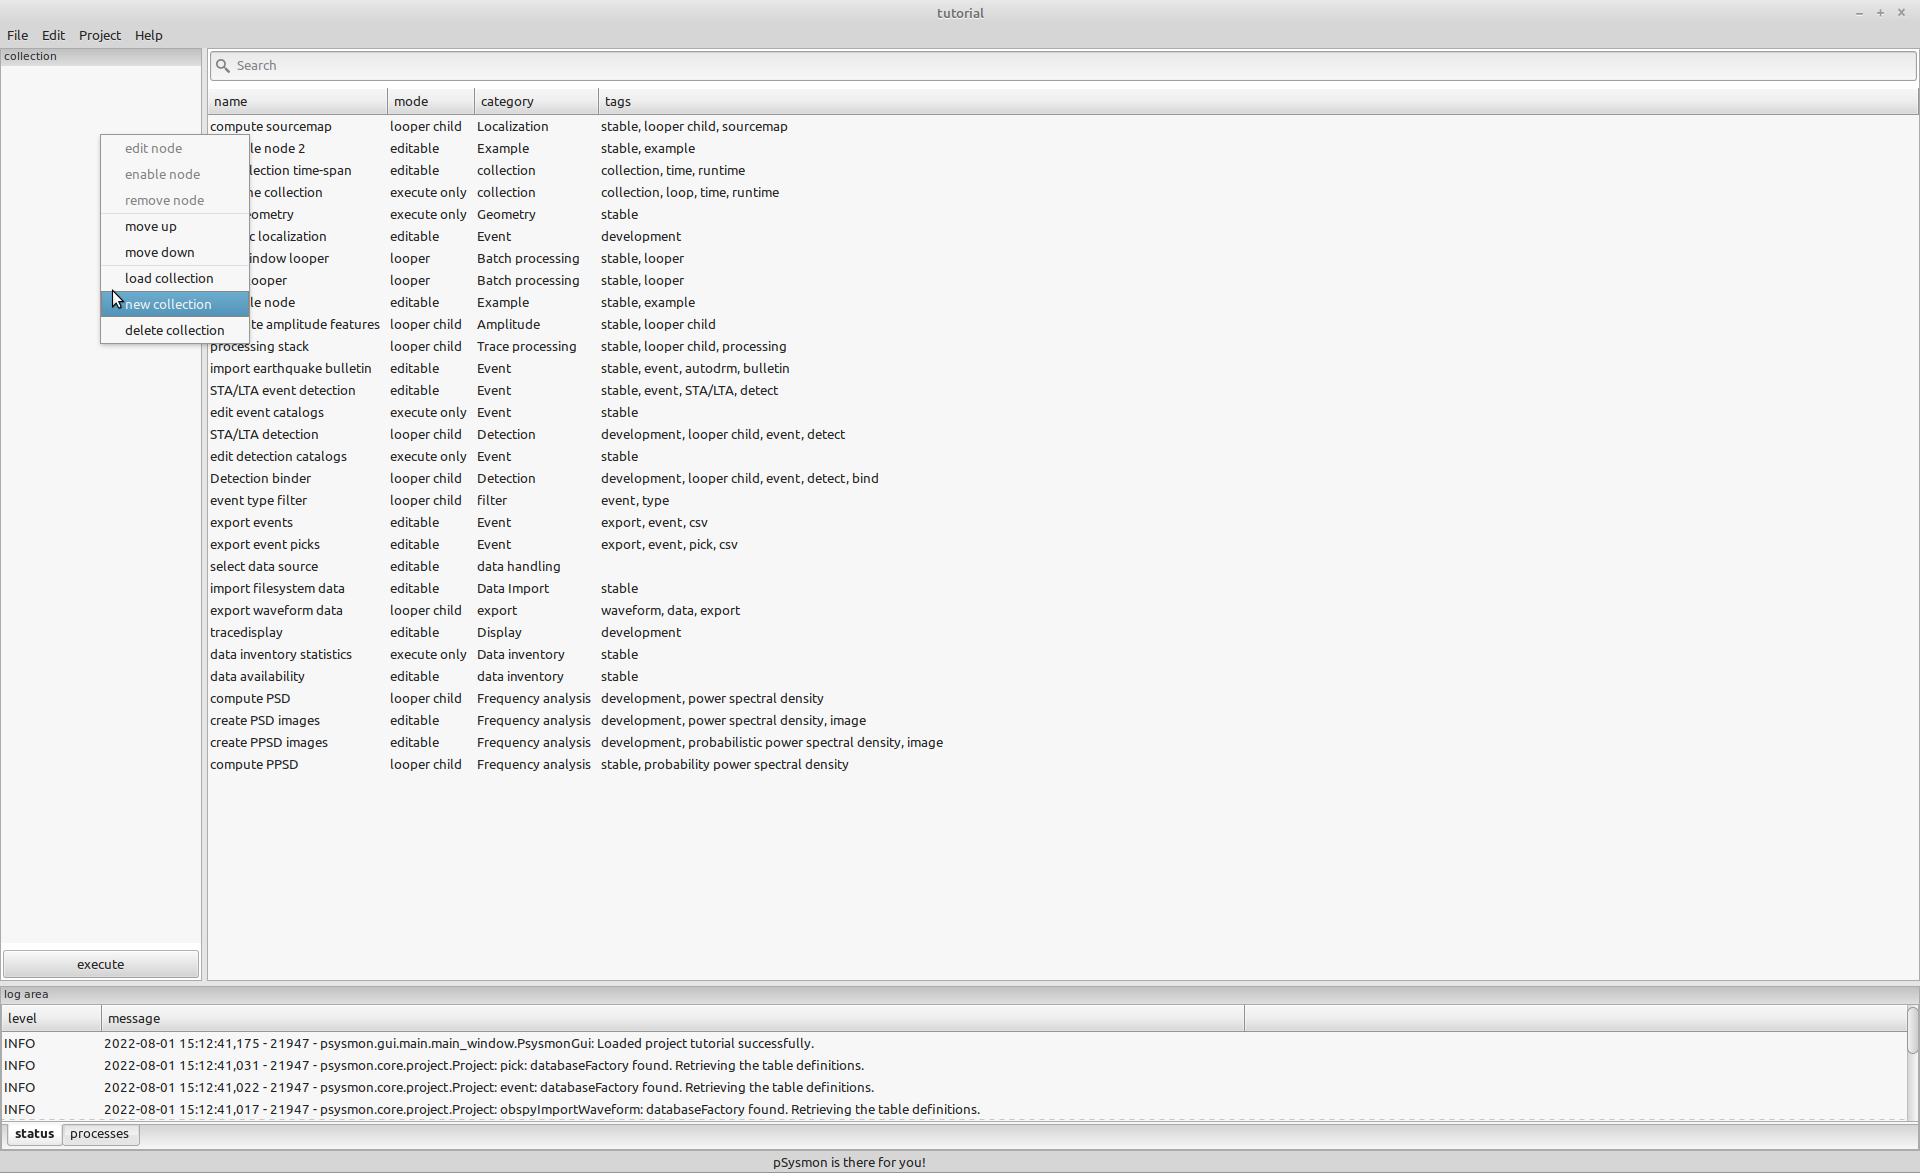
To create a new collection, move the mouse pointer inside the collection listbox on the left side of the window and then open the context menu by clicking the right mouse button. In the context menu click the menu entry new collection.
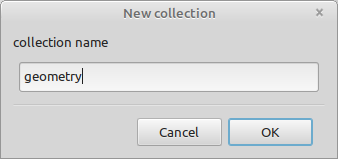
The New collection dialog will open. Enter the name geometry for the new collection and confirm by clicking the ok button.
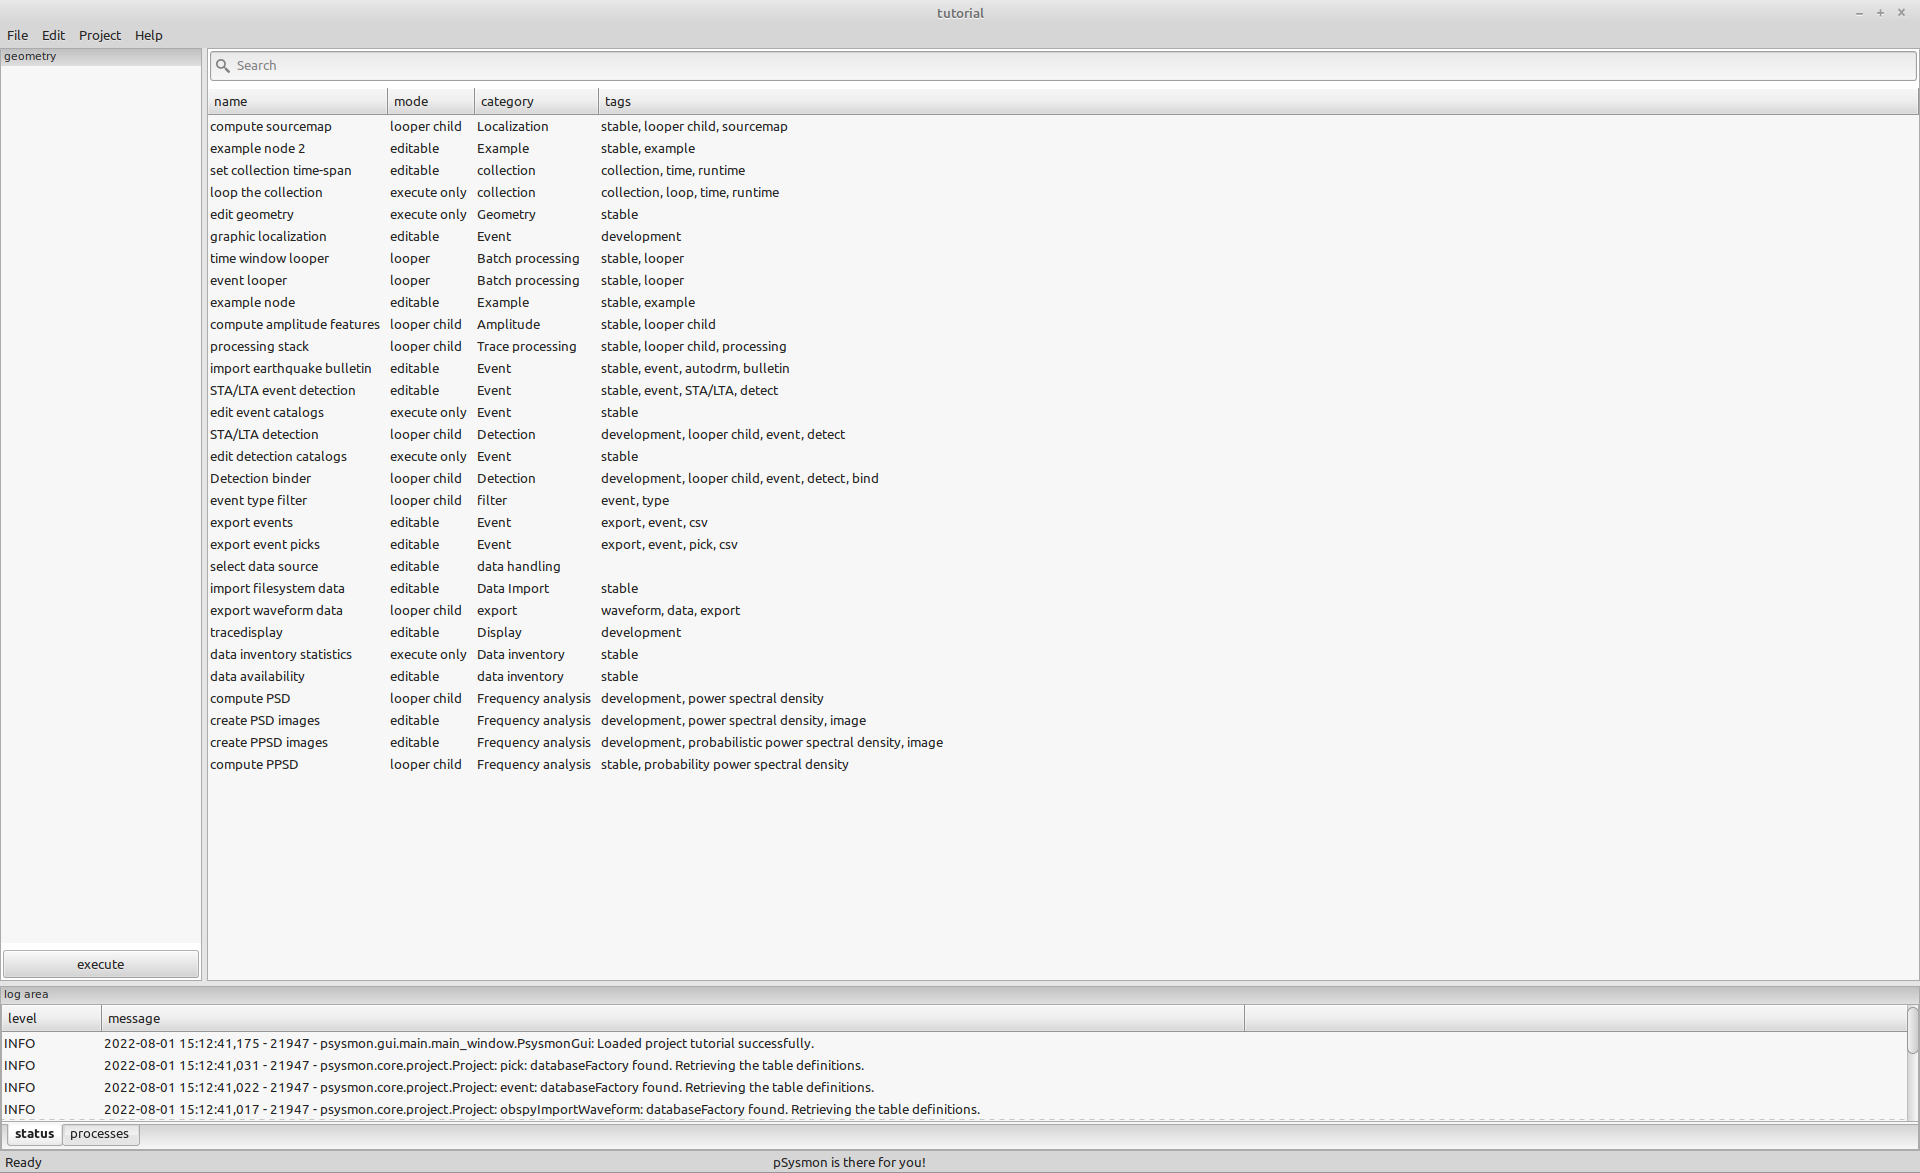
The title of the collection listbox will be changed to geometry.
Add the edit geometry collection node
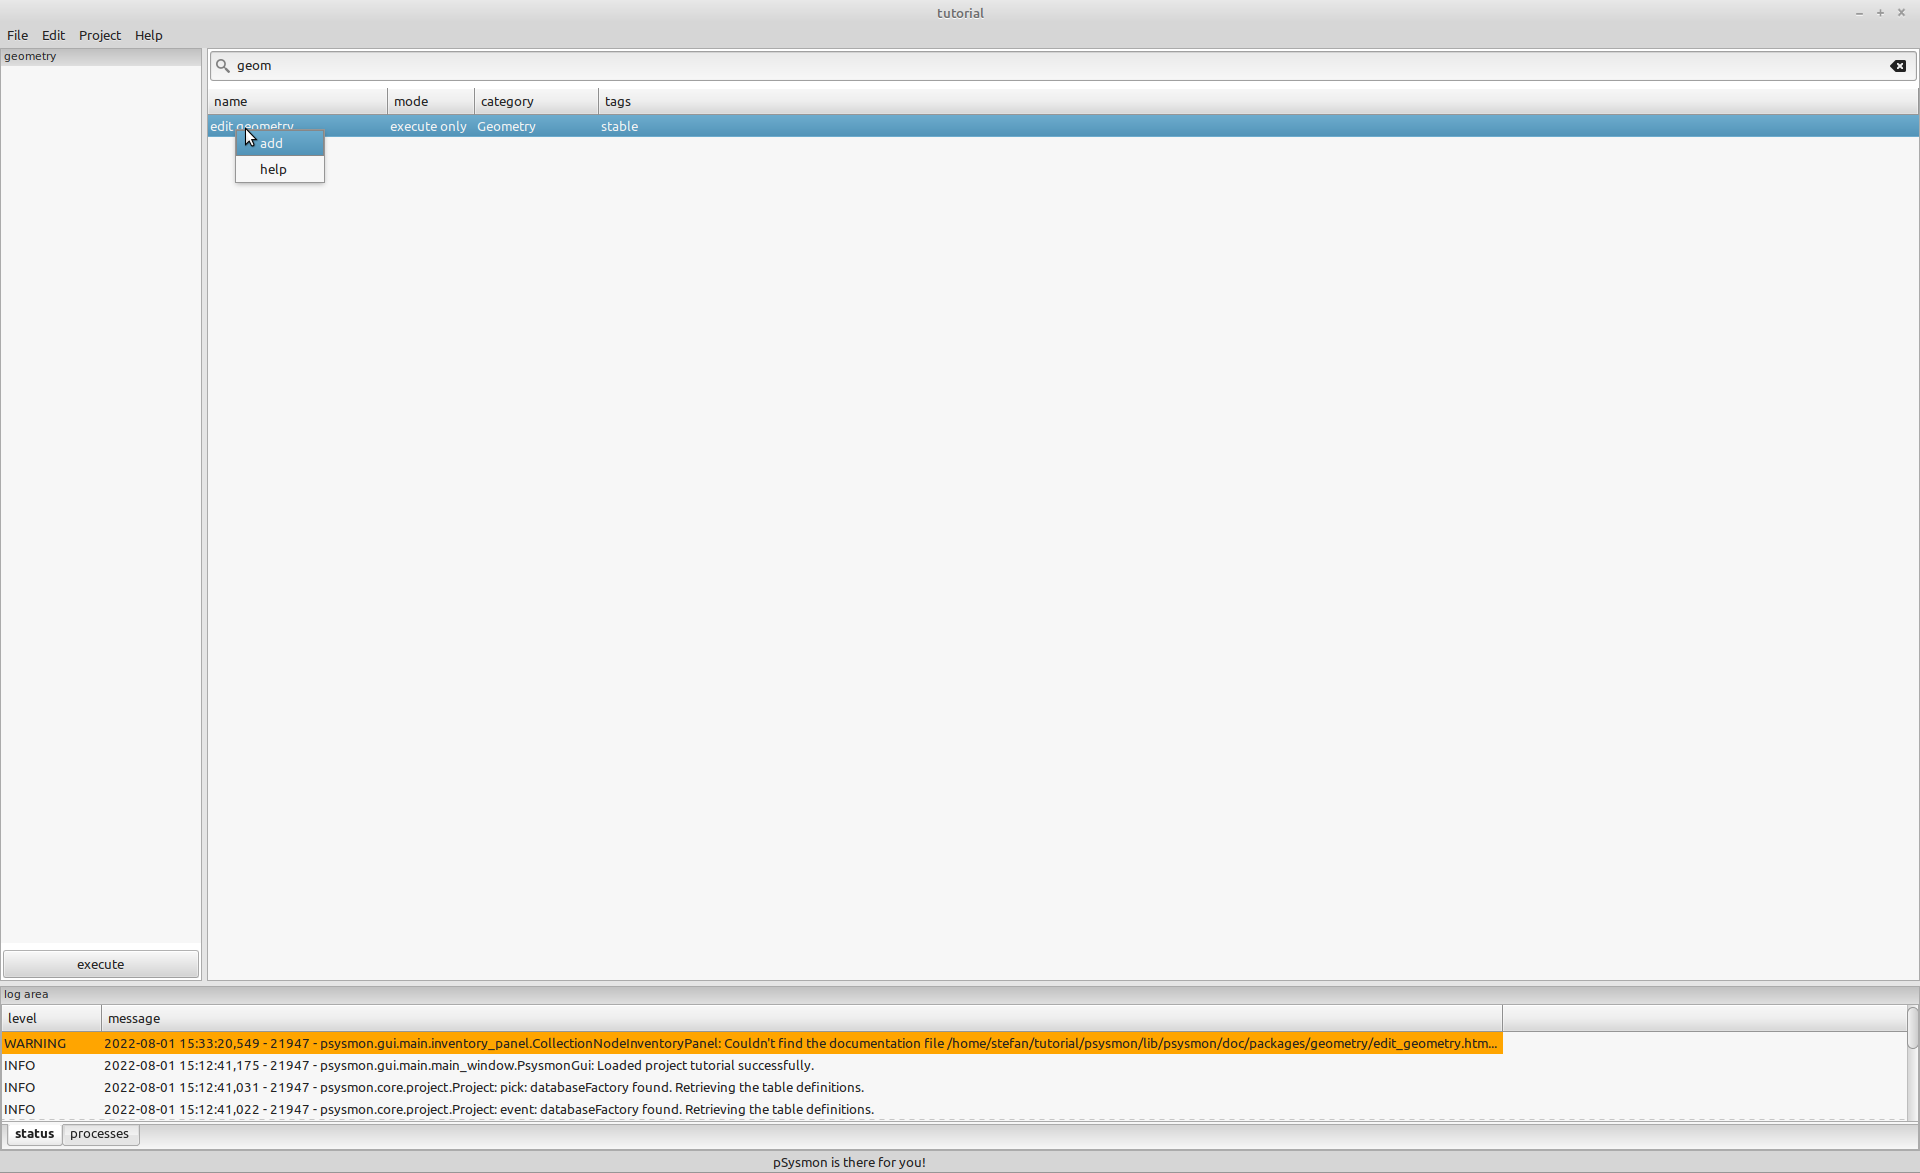
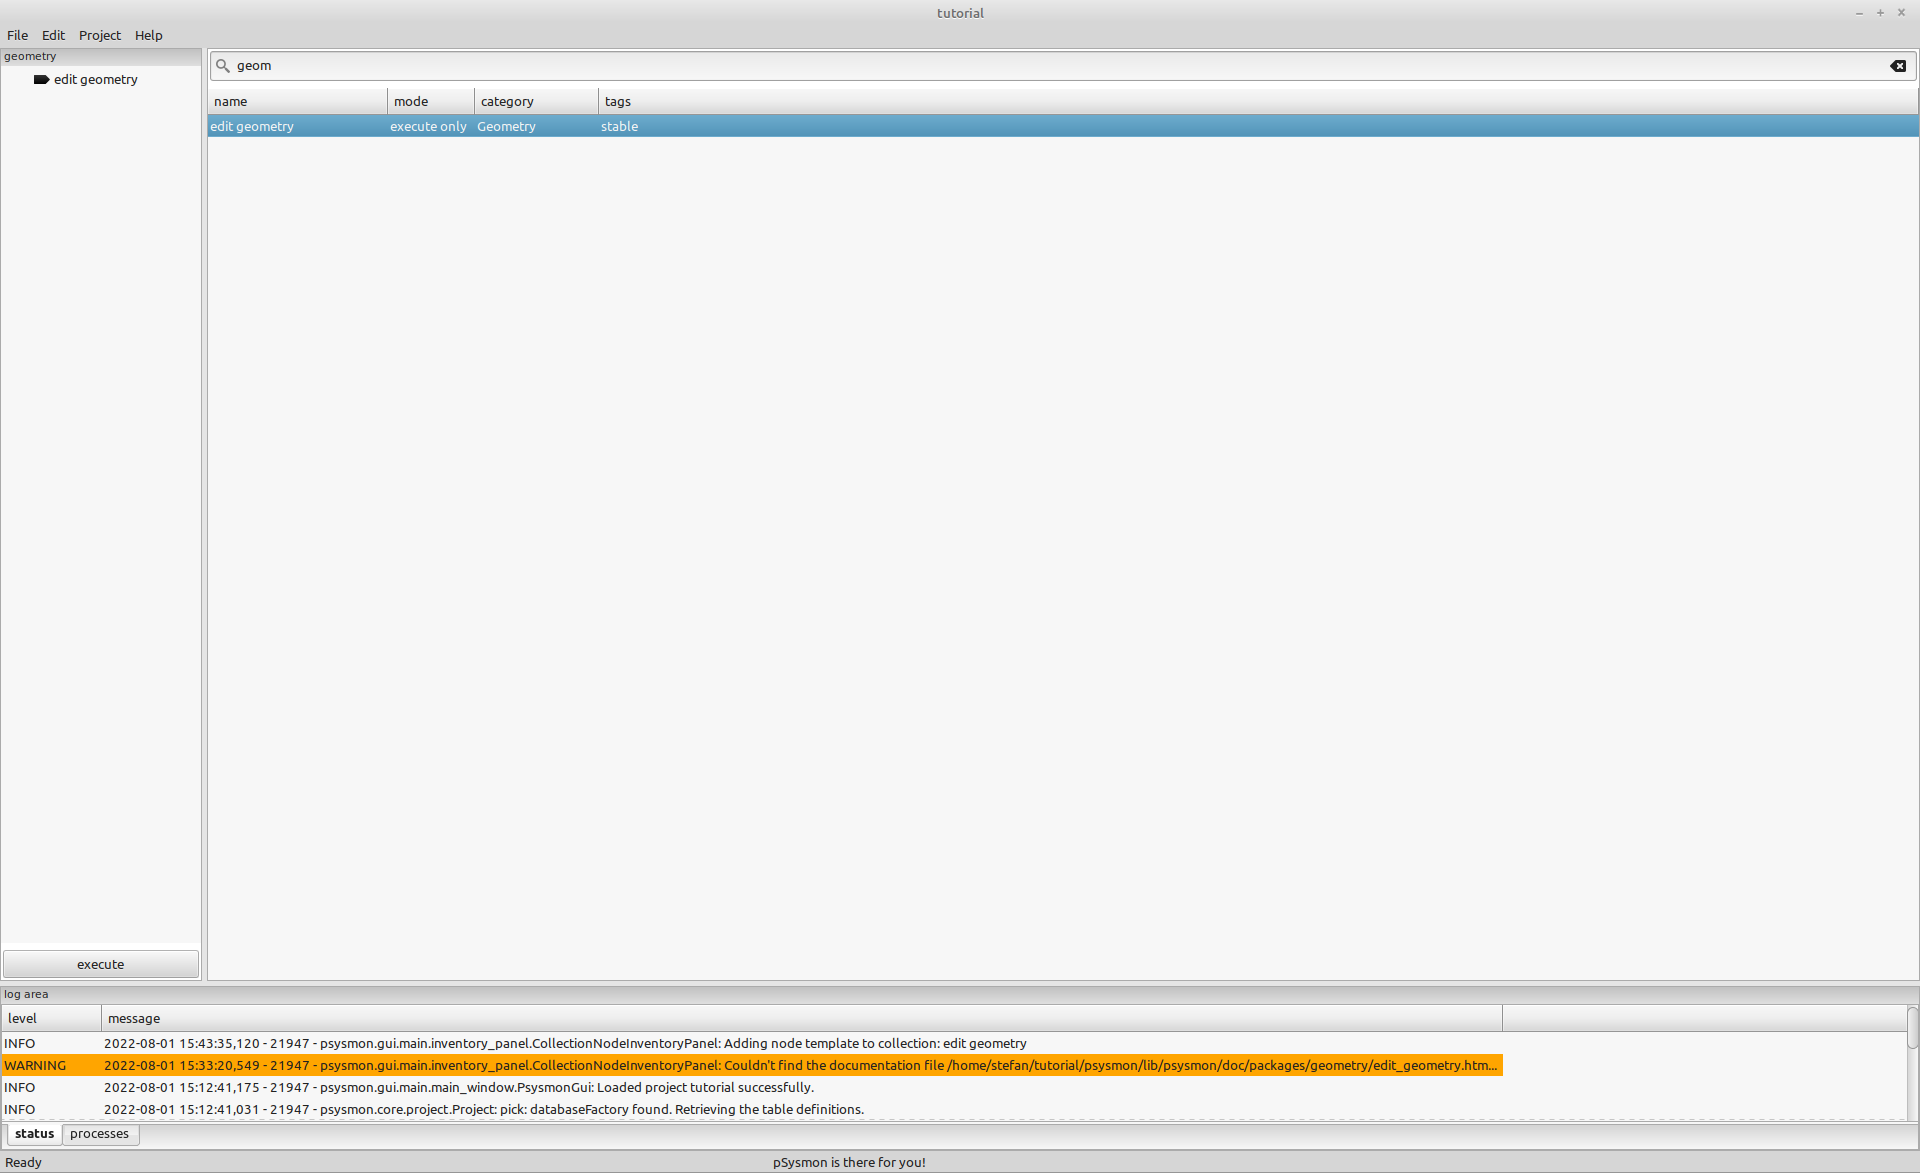
To add the edit geometry collection node, start typing geometry in the search field on top of the collection node inventory listbox (the field with the magnifying glass). While typing, the entries in the collection node inventory listbox will change according to the search term. When reaching the search term geom, only the edit geometry collection node should be shown in the collection node inventory listbox. Select the edit geometry collection node in the inventory listbox and add it using the add item in the context menu. The context menu can be opened by clicking the right mouse button.
After selecting the add menu entry, the edit geometry collection node should appear in the collection listbox on the left.
If you are wondering about the warning message marked in orange in the log area, this warning was caused by me when I clicked the help menu entry in the context menu. The help system is currently not working.
Execute the geometry collection
To open the geometry editor you now have to execute the geometry collection. This is done by clicking the execute button at the bottom of the collection listbox. For this tutorial, no geometry has been defined so far, so an empty database inventory named db_inventory is shown in the editor. The lists for the available sensors, recorders, stations, networks and arrays is empty at that point.

Opening the geometry XML file
To import a geometry XML file select the menu File->Import from XML in the menu bar of the geometry editor.
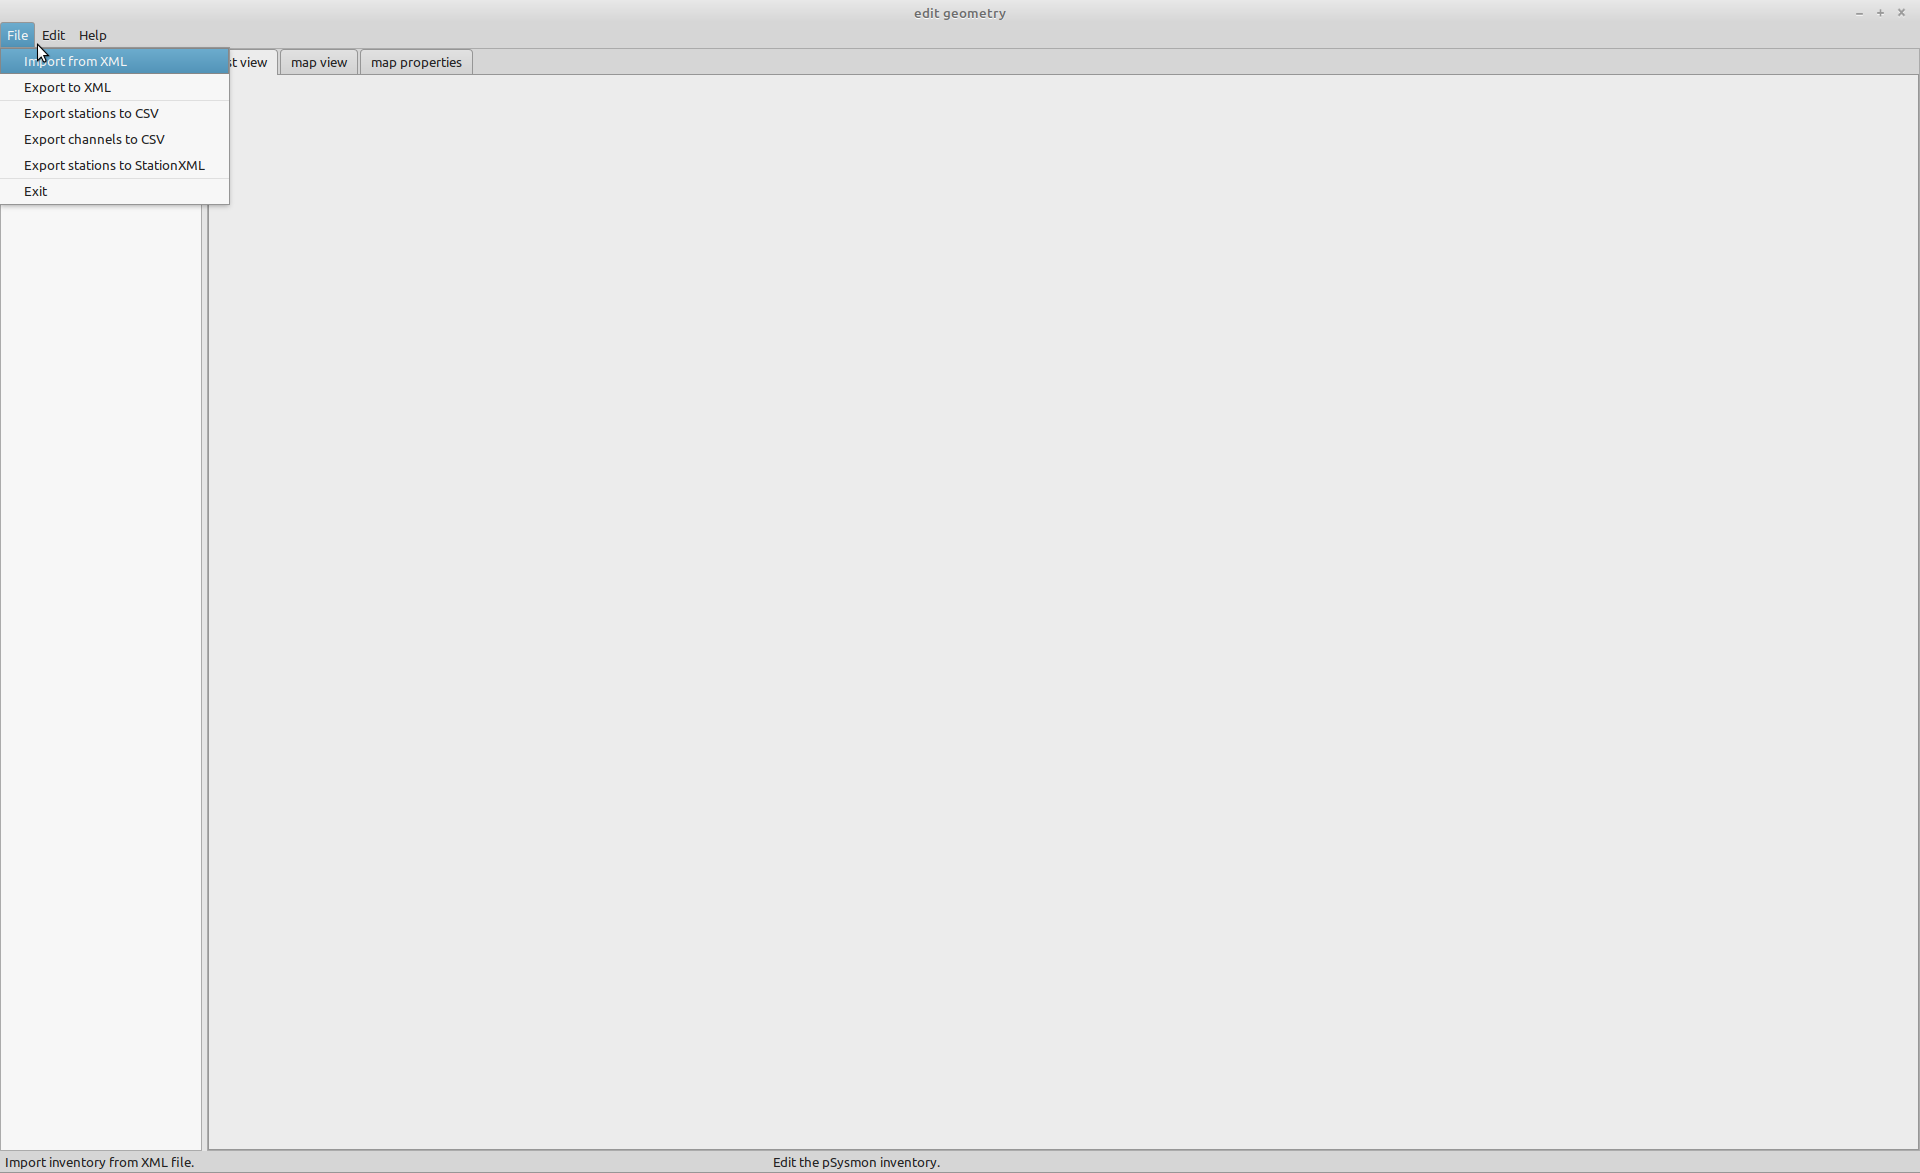
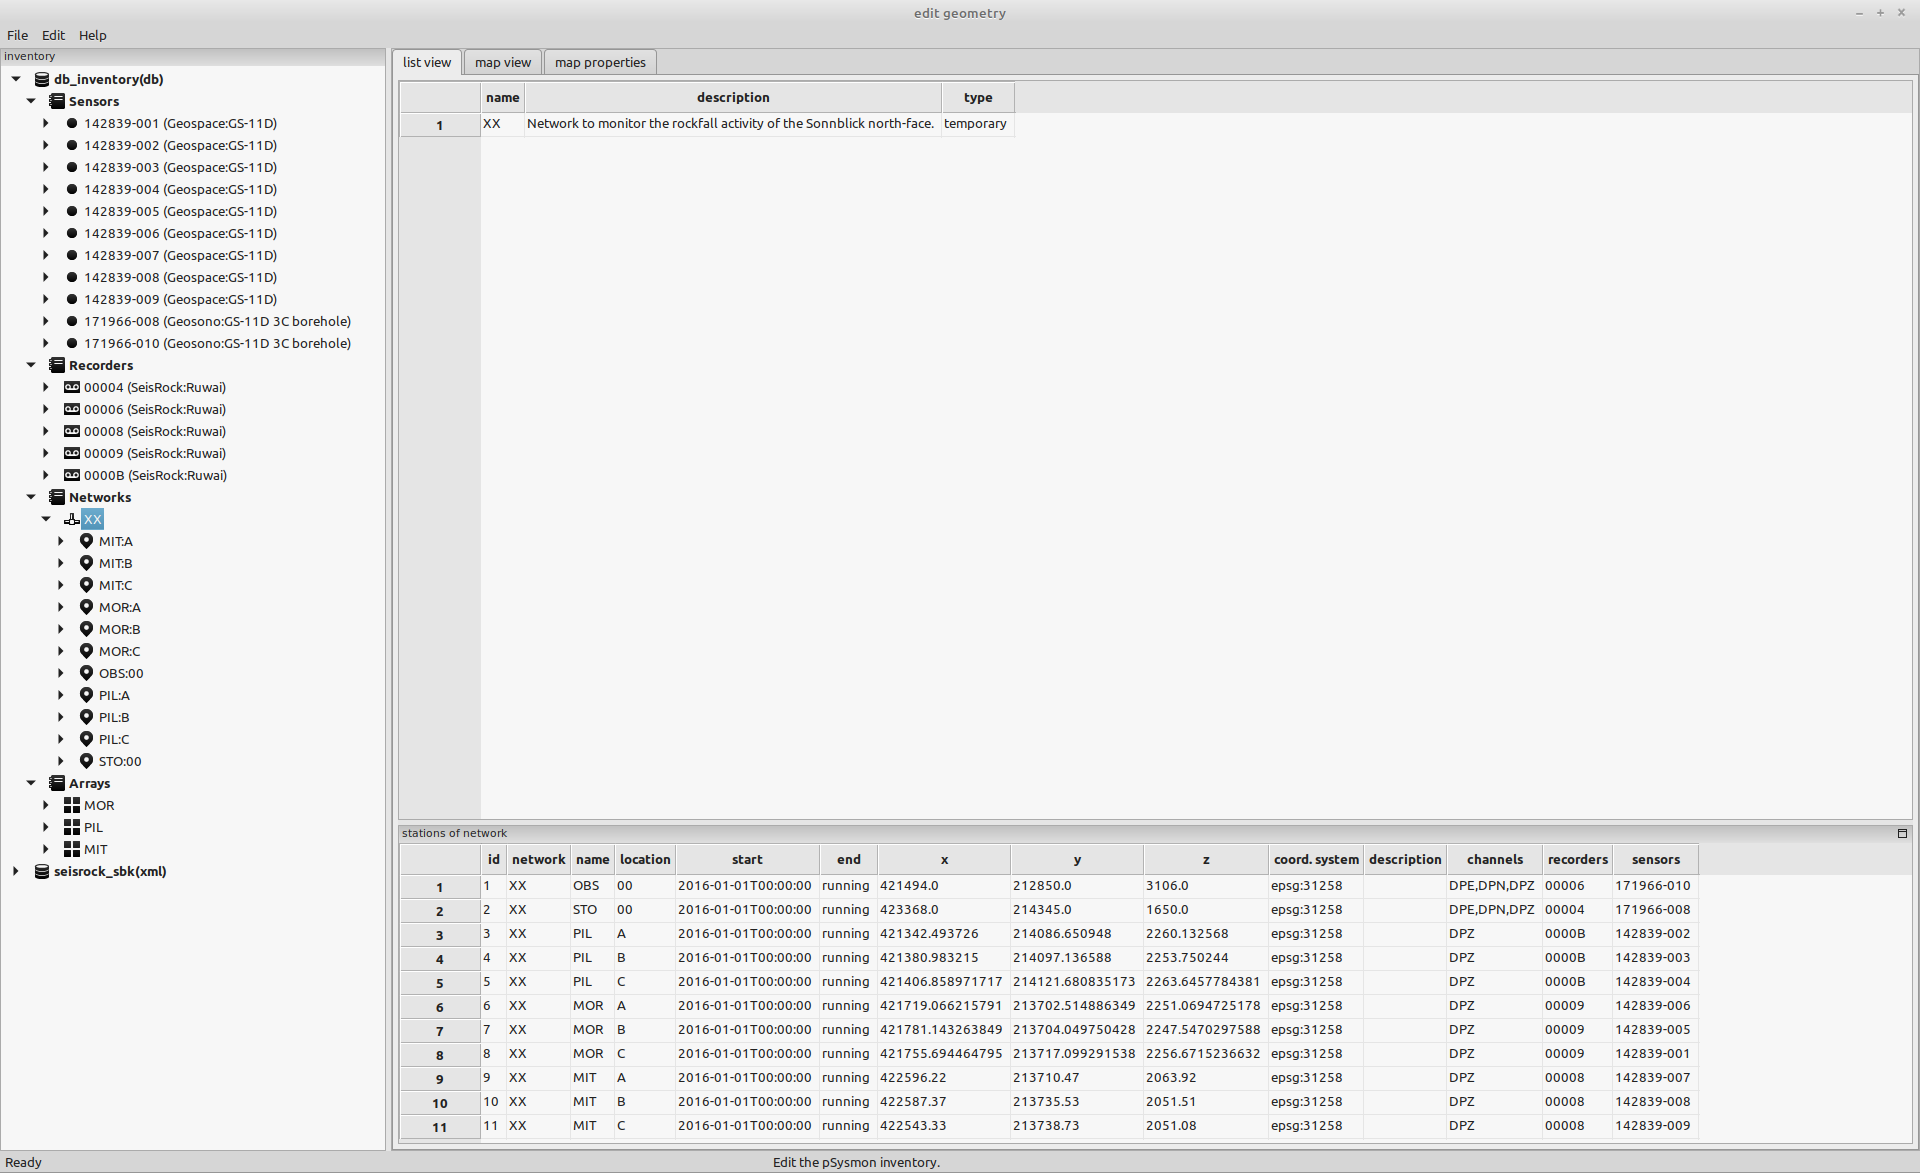
A file selection dialog will open. Navigate to the geometry file seisrock_sbk_inventory.xml of the tutorial data set and open it. The inventory will be read from the XML file and displayed in the geometry editor as an xml inventory. After importing the geometry file, all elements of the inventory will be expanded by default.

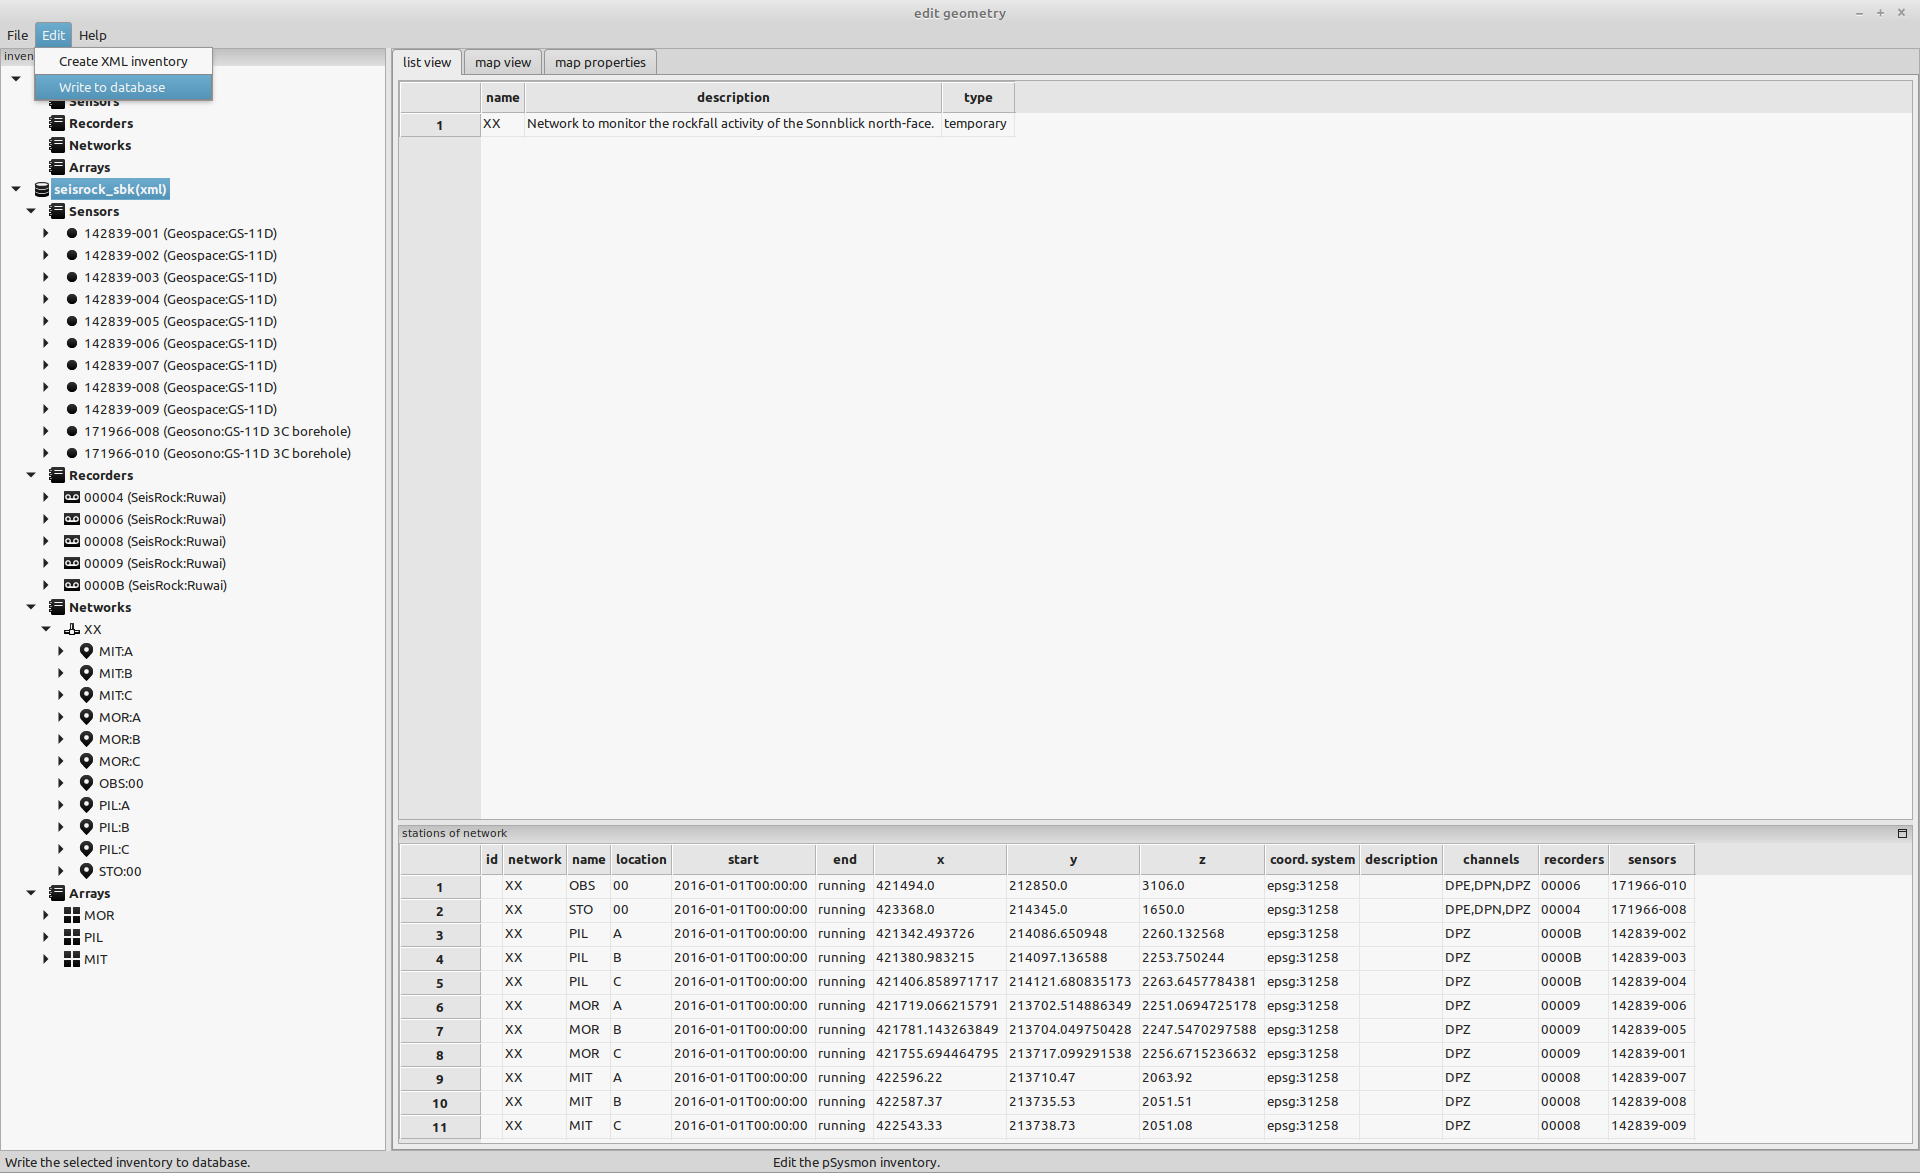
You can collapse the whole inventory tree by clicking the seisrock_sbk(xml) inventory item in the inventory tree and then opening the context menu by clicking the right mouse button. Select the collapse menu entry in the context menu. The seisrock_sbk(xml) inventory tree will be collapsed. Expand the desired tree items by clicking the triangles on the left of the inventory tree items.
Selecting items in the inventory tree will show details of the item in the list view panel on the right side of the geometry editor. In the following example I have expanded all items on level 1 of the inventory tree (Sensors, Recorders, Networks, Arrays) and the network XX to show the stations of the network. I have selected the network XX item in the inventory tree to display the network summary in the list view.

Importing the XML inventory into the database
Once the geometry imported from the XML file was checked for correctness, it can be written to the psysmon database to make it permanently available. Usually the import of the geometry from an XML file to the psysmon database has to be done once at the start of the project.
When the inventory changes over time (e.g. new stations, change of sensors or recorders, …) the database inventory can be updated by re-importing the inventory from the updated geometry file.
To write the seisrock_sbk(xml) inventory to the database, select the seisrock_sbk(xml) item in the inventory tree and then click the menu item `Edit->Write to database.
After the XML inventory was written successfully to the database, the database inventory db_inventory(db) is shown expanded in the inventory tree.
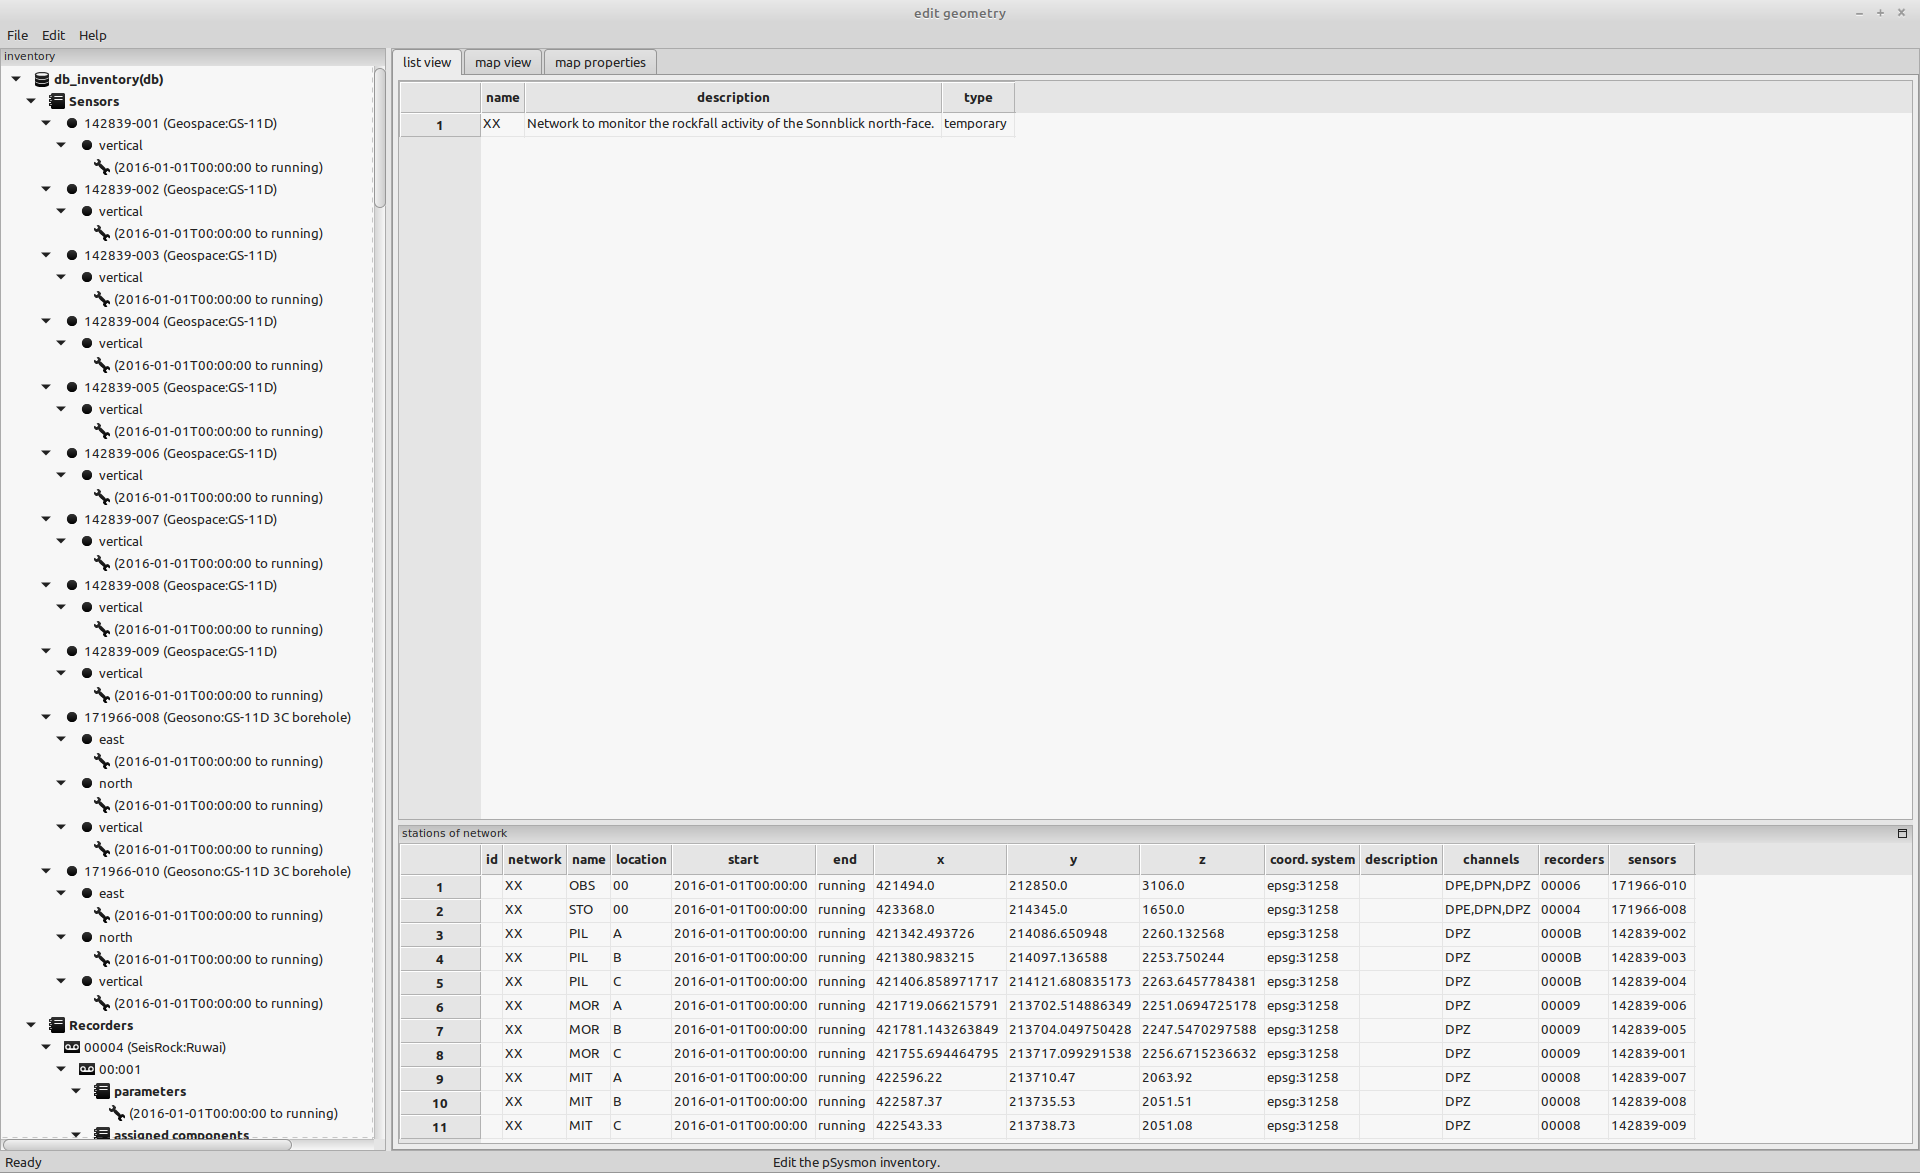
As described above, use the context menu and the expand/collapse triangles of the inventory tree to create an overview of the database inventory in the inventory tree and the list view. After a successful import the database inventory contains the same elements as the XML inventory.
Map view of the inventory
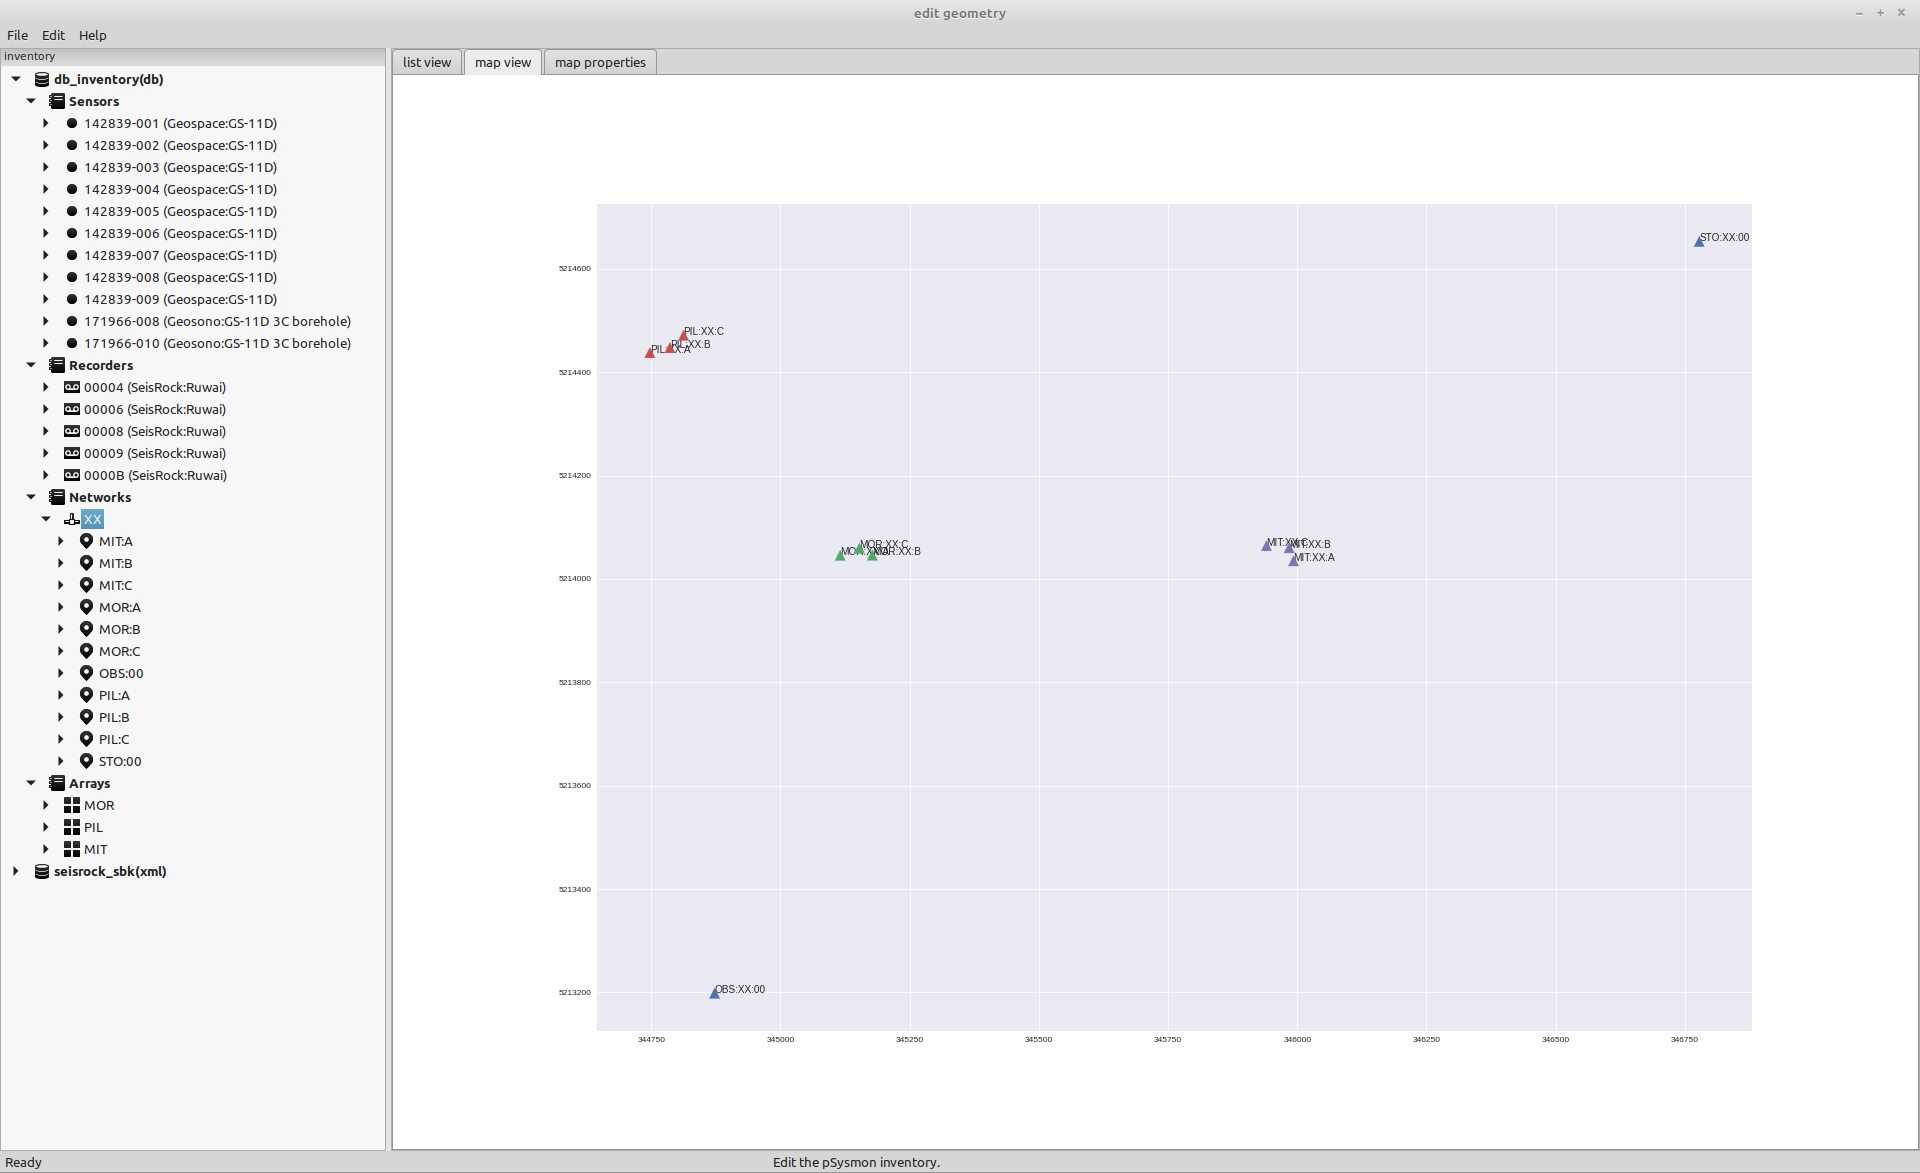
The map view of the selected inventory can be opened by selecting the map view tab in the panel view of the geometry editor.The map view visualizes the station locations of the inventory. The 5 stations of the Sonnblick network are shown. Stations MOR, PIL and MIT are arrays with three locations A, B and C.
Close the editor
The geometry has now been imported into the psysmon database. The geometry editor can now be closed, either by clicking the window close icon (usually a cross) on the top right of the window frame or by clicking the menu entry File->Exit.
Save the project
Return to the psysmon main window and select the menu entry File->Save project. This will save the newly created collection geometry for later use.

Copyright © 2022 Stefan Mertl.
This article is licensed under a Creative Commons Attribution-ShareAlike 4.0 International license.
You are allowed to share the material, that means to copy and redistribute the material in any medium or format as long as you give appropriate credit to the creator and add the link to the license. You are allowed to adapt, that means to remix, transform, and build upon the material. If you adapt the material, you must distribute your contributions under the same license as the original.
If possible, please cite this article using the following form:
Psysmon Documentation, Sonnblick Events, "Import geometry file", Stefan Mertl, 2022-08-27, www.mertl-research.at, licensed under CC BY-SA 4.0